
Woodworking is one of the most rewarding hobbies you can pursue. There's something magical about transforming a raw piece of wood into a beautiful, functional object with your own hands. Whether you dream of building custom furniture, crafting decorative pieces, or simply want to repair items around your home, this comprehensive guide will give you the foundation you need to start your woodworking journey.
As someone who has been teaching woodworking for over 15 years, I've seen countless beginners transform from nervous first-timers into confident craftspeople. The key is starting with the right knowledge, tools, and mindset. Let's dive into everything you need to know to begin your woodworking adventure.
Why Start Woodworking?
Before we dive into the technical aspects, let's talk about why woodworking is such a valuable skill to develop. In our digital world, there's something deeply satisfying about creating something tangible with your hands. Woodworking offers numerous benefits:
- Stress relief and mindfulness through focused, hands-on work
- Development of problem-solving and spatial reasoning skills
- Creation of custom pieces tailored to your exact needs
- Potential for significant cost savings on furniture and home improvements
- A lifetime hobby that continues to challenge and reward you
- Connection to traditional craftsmanship and sustainable practices
Pro Tip
Start woodworking with simple projects that teach fundamental skills. Each project should introduce one or two new techniques while reinforcing what you've already learned. This progressive approach builds confidence and competence simultaneously.
Essential Tools for Beginners
One of the biggest mistakes beginners make is thinking they need every tool immediately. Start with quality basics and build your collection over time. Here are the essential tools every beginner should have:
Power Tools to Consider Later
While hand tools are essential for learning fundamentals, certain power tools can significantly speed up your work once you've mastered the basics:
- Circular Saw: Versatile for rough cutting lumber and sheet goods
- Random Orbital Sander: Essential for achieving smooth finishes
- Router: Creates decorative edges and joinery cuts
- Drill/Driver: For drilling holes and driving screws efficiently
Understanding Wood
Wood is a living material with unique characteristics that affect how you work with it. Understanding these properties is crucial for successful projects.
Wood Movement
Wood expands and contracts with changes in humidity. This movement primarily occurs across the grain (width of boards), not along the length. Always account for this movement in your designs, especially when building large pieces like tabletops or cabinet doors.
Grain Direction Matters
The direction of wood grain affects strength, appearance, and how the wood moves. Always consider grain direction when planning cuts and joints. Wood is strongest along the grain and weakest across it.
Choosing Your First Lumber
For beginners, I recommend starting with these wood types:
- Pine: Soft, inexpensive, easy to work with, great for practice
- Poplar: Harder than pine but still beginner-friendly, takes paint well
- Oak: When you're ready for hardwood, oak is durable and forgiving
- Plywood: Stable and consistent, perfect for cabinet backs and shelves
Fundamental Techniques
Mastering these basic techniques will form the foundation of all your future woodworking projects.
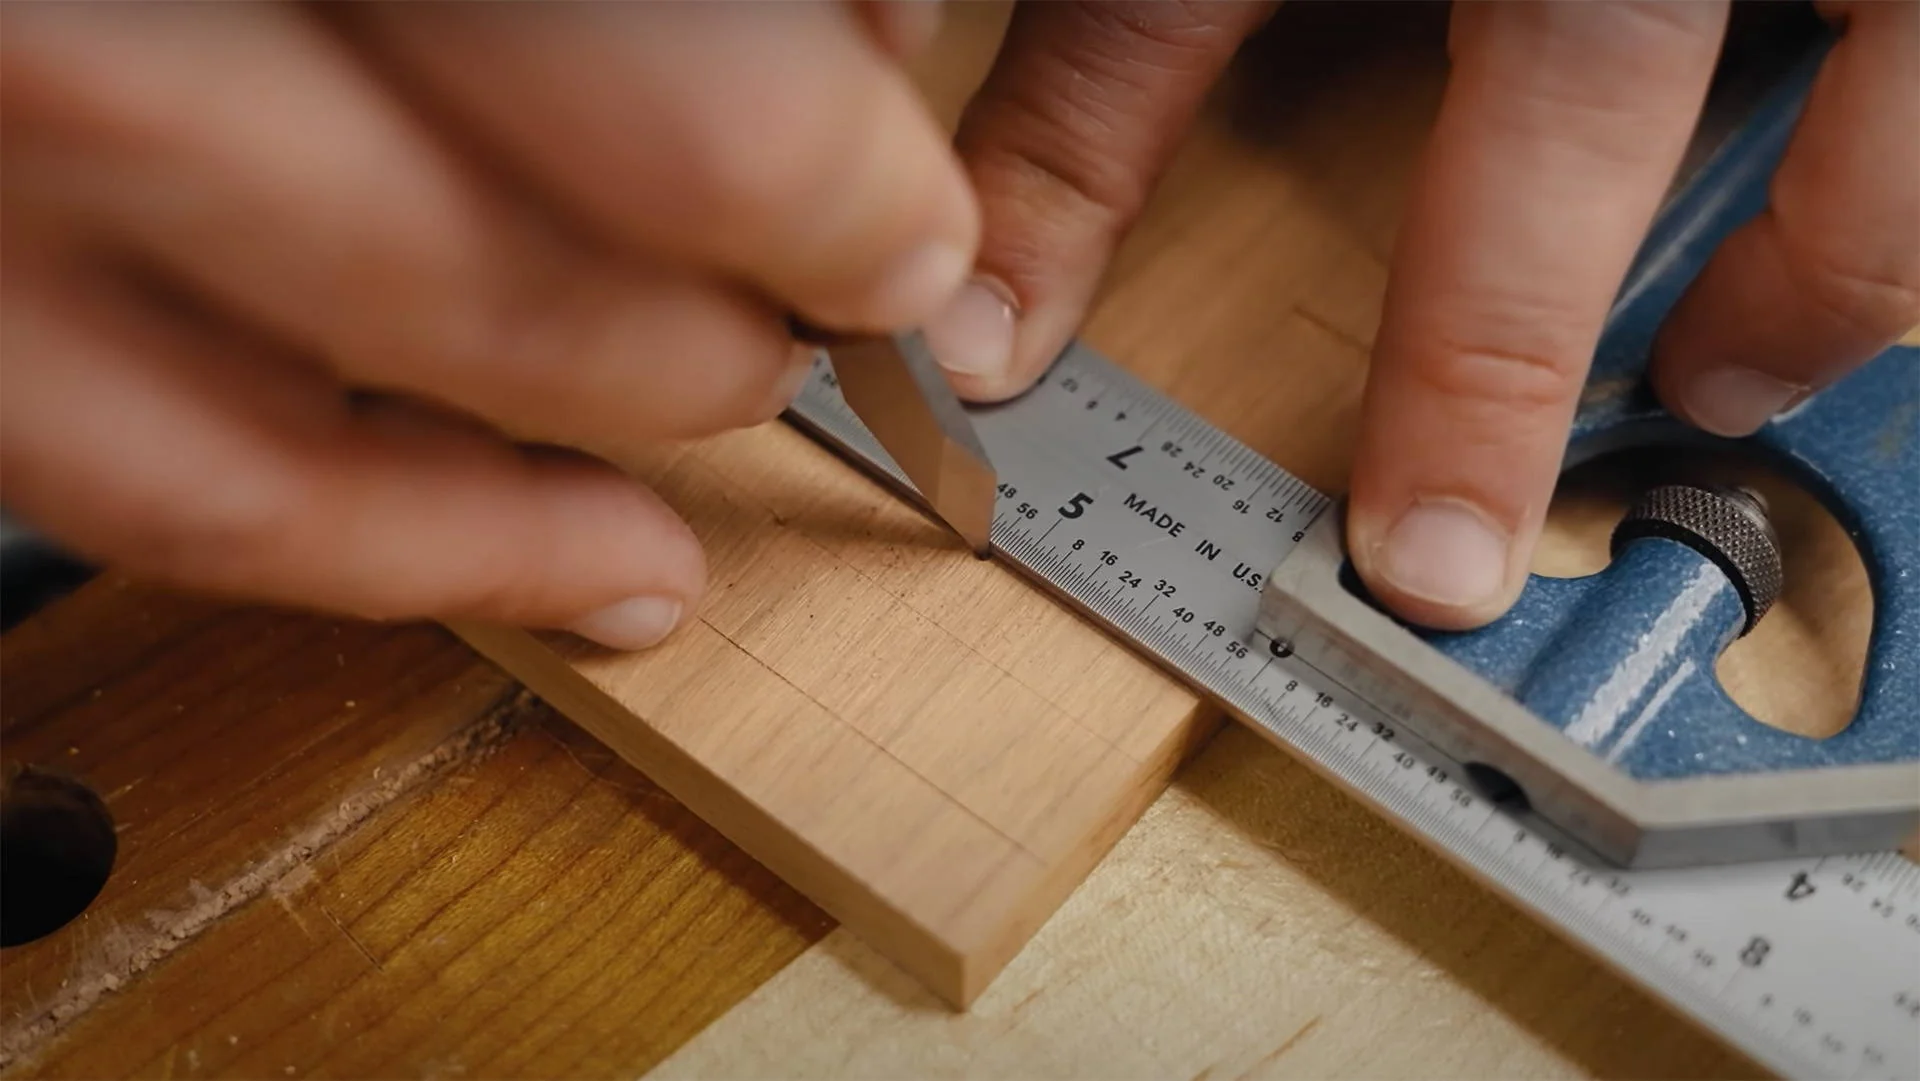
Measuring and Marking
Measure twice, cut once. This old adage has saved countless projects and fingers. Accuracy in measuring and marking is the difference between professional-looking results and obvious amateur work.
-
Mark with a knife, not just a pencil
A marking knife creates a precise line that prevents tear-out when cutting. Use a sharp knife and a square for the most accurate marks.
-
Double-check all measurements
Verify measurements from multiple reference points. A small error compounds quickly in woodworking.
-
Use story sticks for repetitive measurements
Create a wooden stick marked with all the key dimensions of your project. This eliminates measurement errors and speeds up layout work.
Cutting Techniques
Clean, accurate cuts are the hallmark of good woodworking. Whether using hand tools or power tools, proper technique is essential.
Hand Saw Technique
Start cuts with light strokes to establish the kerf, then use full strokes with moderate pressure. Let the saw do the work – forcing it will create rough cuts and tire you out quickly.
Safety First
Always wear safety glasses when cutting wood. Keep your hands away from the cutting line and maintain a stable stance. A sharp tool is safer than a dull one – it requires less force and gives you better control.
Your First Project: Simple Box
The best way to learn woodworking is by doing. A simple box incorporates all the fundamental skills while creating something useful. This project will teach you measuring, cutting, and basic joinery.
Materials Needed:
- 1x6 pine board, 4 feet long
- 1/4" plywood for the bottom
- Wood glue
- Small finish nails
- Sandpaper (120 and 220 grit)
-
Plan and measure
Decide on your box dimensions. For a first project, try 8" x 6" x 4" tall. Mark out all pieces on your lumber before cutting.
-
Cut your pieces
Cut two pieces 8" long and two pieces 6" long for the sides. Cut the bottom from plywood to fit inside the assembled sides.
-
Sand before assembly
It's much easier to sand individual pieces than an assembled project. Start with 120 grit, then 220 grit.
-
Dry fit first
Assemble the box without glue to ensure everything fits properly. Make any adjustments needed.
-
Glue and clamp
Apply glue to the end grain and assemble. Use clamps or tape to hold while the glue dries. Add small nails for extra strength if desired.
-
Attach the bottom
Once the sides are dry, measure and cut the bottom to fit. Glue and nail it in place.
-
Final sanding and finish
Give the assembled box a final light sanding, then apply your choice of finish – oil, wax, or clear coat.
Safety in the Workshop
Woodworking safety isn't just about avoiding accidents – it's about creating habits that let you enjoy woodworking for years to come.
Essential Safety Rules:
- Always wear safety glasses when cutting, sanding, or using power tools
- Keep tools sharp – dull tools are dangerous tools
- Maintain a clean, organized workspace
- Never remove safety guards from power tools
- Understand each tool before using it
- Take breaks when tired – fatigue leads to accidents
Building Your Skills
Woodworking is a lifelong learning journey. Each project teaches new skills and reinforces existing ones. Here's how to continue developing:
Progressive Project Ideas:
- Simple box (basic cutting and assembly)
- Cutting board (edge-gluing and finishing)
- Picture frame (mitered corners and precise fitting)
- Small shelf (dadoes and rabbets)
- Simple stool (mortise and tenon joints)
Join a Community
Woodworking is more enjoyable and educational when shared with others. Look for local woodworking clubs, maker spaces, or online communities. Learning from experienced woodworkers accelerates your progress and helps you avoid common mistakes.
Common Beginner Mistakes
Learn from these common mistakes to accelerate your progress:
- Rushing measurements: Take time to measure accurately
- Skipping planning: Draw your project and think through each step
- Using dull tools: Sharp tools are safer and produce better results
- Ignoring grain direction: Always consider how grain affects strength and appearance
- Poor workspace organization: A cluttered shop is inefficient and dangerous
Next Steps in Your Journey
Once you've completed your first few projects, you'll be ready to tackle more complex builds. Consider learning these intermediate skills:
- Basic joinery (dados, rabbets, mortise and tenon)
- Using a router for decorative edges
- Understanding different wood finishing techniques
- Reading and modifying woodworking plans
- Proper wood storage and workshop organization
Remember, every master craftsperson started as a beginner. Be patient with yourself, focus on learning proper techniques, and most importantly, enjoy the process. Woodworking should be rewarding and relaxing, not stressful.
The journey from beginner to skilled woodworker is filled with discoveries, challenges, and immense satisfaction. Each shaving that curls off your plane, each perfect joint, and each completed project builds not just skills, but confidence and pride in your abilities.
Start small, be safe, and let your passion for creating beautiful things guide your learning. Before you know it, you'll be designing and building projects that seemed impossible when you started. Welcome to the wonderful world of woodworking!